The Art Behind the Trophy
Taxidermy is more than preserving an animal. At its best, it is sculpture, anatomy, design, memory, and wilderness storytelling blended into one craft. For hunters, collectors, lodge owners, and outdoor enthusiasts, a finished mount becomes a permanent connection to a moment in the field. It remembers the terrain, the weather, the patience, the shot, the retrieval, and the story that gets told every time someone walks into the room. Mount design is where that memory becomes visual. A mount can feel stiff and ordinary, or it can feel alive with movement, expression, and presence. The difference often comes down to pose, placement, proportion, habitat detail, lighting, and how the mount fits into the larger room. A beginner who understands these fundamentals can make smarter choices, whether working with a professional taxidermist, planning a trophy room, or learning the craft from the ground up.
A: A deer shoulder mount or European skull mount is often the easiest starting point.
A: Pose controls the movement, personality, and viewing angle of the finished mount.
A: Yes, they are affordable, rustic, space-saving, and easy to customize.
A: Focus on accurate anatomy, natural expression, proper lighting, and clean grooming.
A: Choose one when you have enough room and want a dramatic centerpiece display.
A: Yes, direct sunlight can fade fur, feathers, paint, and natural materials over time.
A: Spacing, lighting, cohesive materials, strong focal points, and quality mounts.
A: Yes, they add realism and help the mount feel connected to a natural setting.
A: Use fewer mounts, better spacing, vertical layouts, and clear design themes.
A: Ask about pose options, timeline, examples of work, field care, pricing, and display recommendations.
What Taxidermy Really Involves
Taxidermy is the process of preserving and presenting an animal’s appearance in a lifelike way. Modern taxidermy typically uses a prepared hide or skin placed over a sculpted form, with carefully shaped facial features, realistic eyes, detailed ears, accurate muscle structure, and finishing work that restores the natural look of the animal. The goal is not simply to keep the animal’s outer appearance. The goal is to recreate presence.
For beginners, it helps to think of taxidermy as a combination of biology and fine art. The taxidermist studies anatomy, movement, fur direction, feather placement, color, symmetry, and expression. A great mount does not look like an object. It looks like a frozen second in nature. The head turn, ear position, eye angle, shoulder shape, and habitat base all work together to suggest alertness, motion, calm, power, or tension.
Why Mount Design Matters
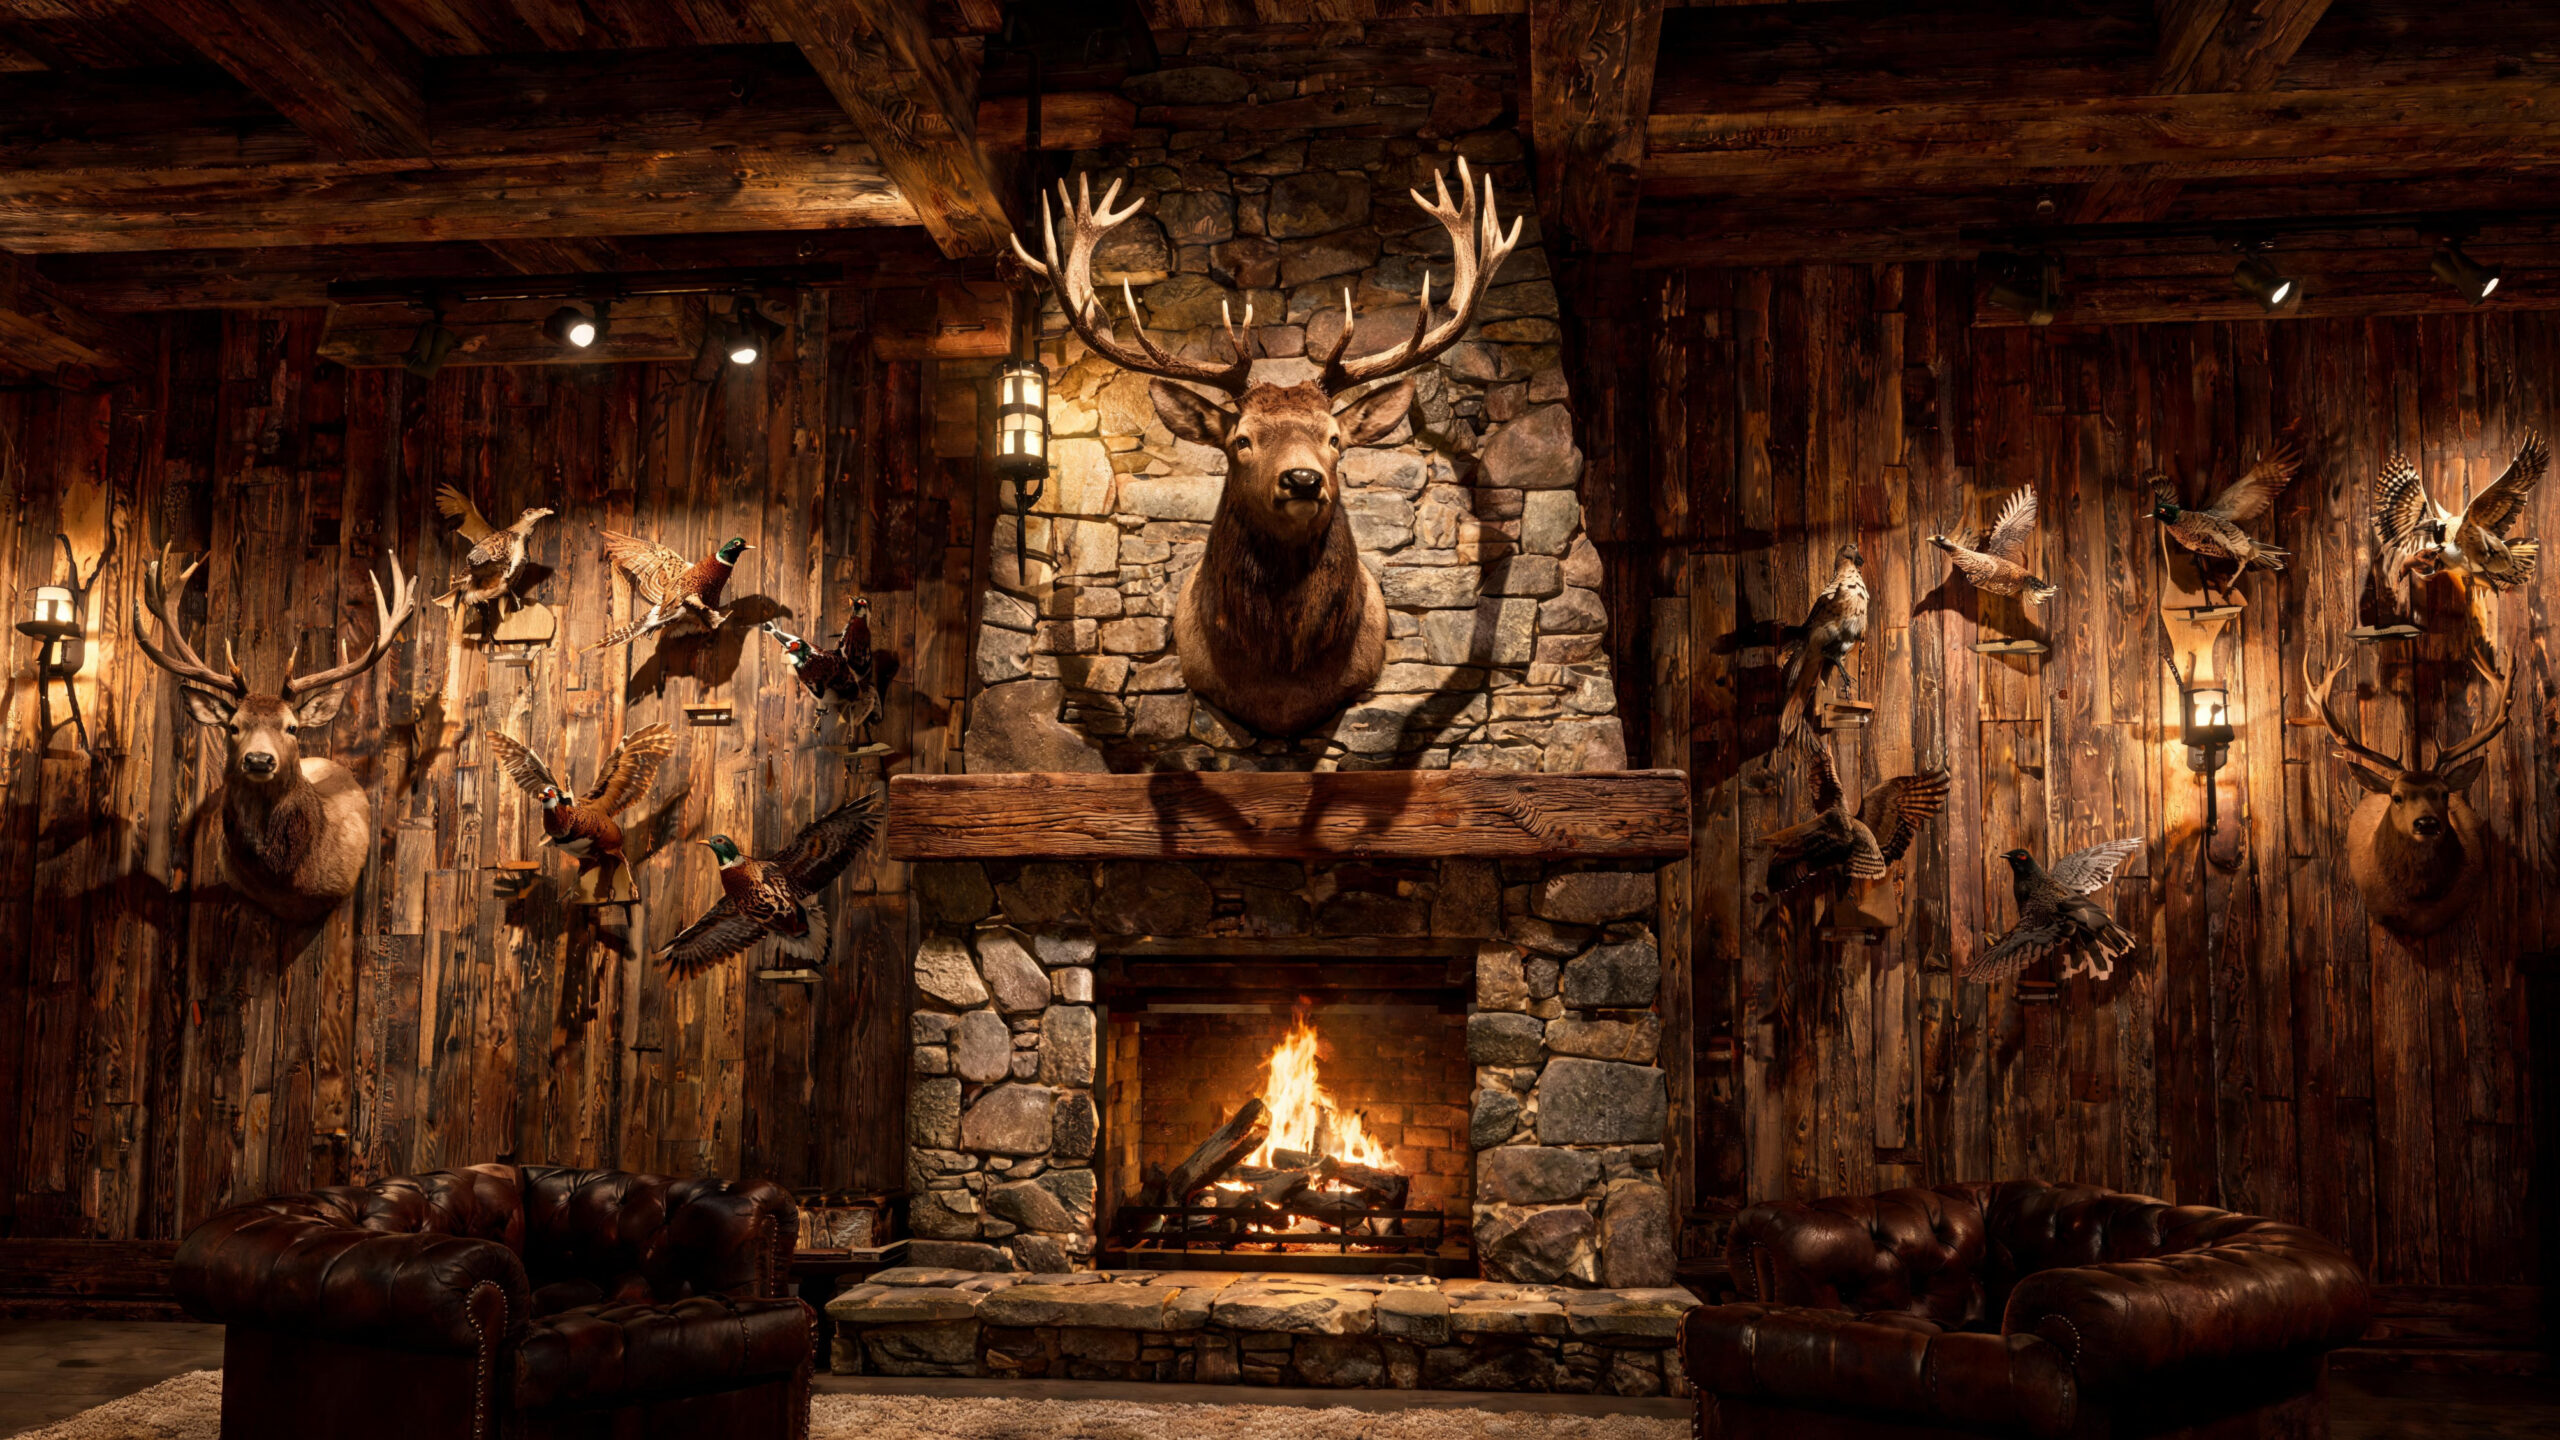
Mount design begins before the animal ever reaches the wall. The pose, form, display angle, plaque, base, lighting, and room location all affect the final impact. A whitetail shoulder mount with a straight-ahead pose creates a very different feeling than a semi-sneak turn looking across the room. A European skull mount on weathered barnwood sends a different message than a full pedestal mount with grass, stone, and habitat detail. Good mount design also prevents trophy rooms from feeling crowded or random. Instead of placing every mount wherever wall space happens to be open, smart design creates a visual rhythm. Large mounts become anchors. Smaller mounts support the composition. Birds, fish, antlers, skulls, and full body mounts add variety. The room becomes a curated hunting gallery instead of a storage space for trophies.
Understanding the Main Types of Mounts
The most familiar option is the shoulder mount, especially for deer, elk, antelope, moose, and similar game. Shoulder mounts preserve the head, neck, and upper shoulder area, making them ideal for wall displays. They are popular because they offer strong visual impact without requiring much floor space. For many hunters, the first major taxidermy decision is choosing the pose of a shoulder mount.
European mounts are another beginner-friendly option. These skull-and-antler displays are clean, rustic, affordable, and easy to incorporate into cabins, garages, offices, and trophy rooms. They work especially well for hunters who want a natural display without the size or cost of a full shoulder mount. With the right plaque or wall system, European mounts can look surprisingly high-end.
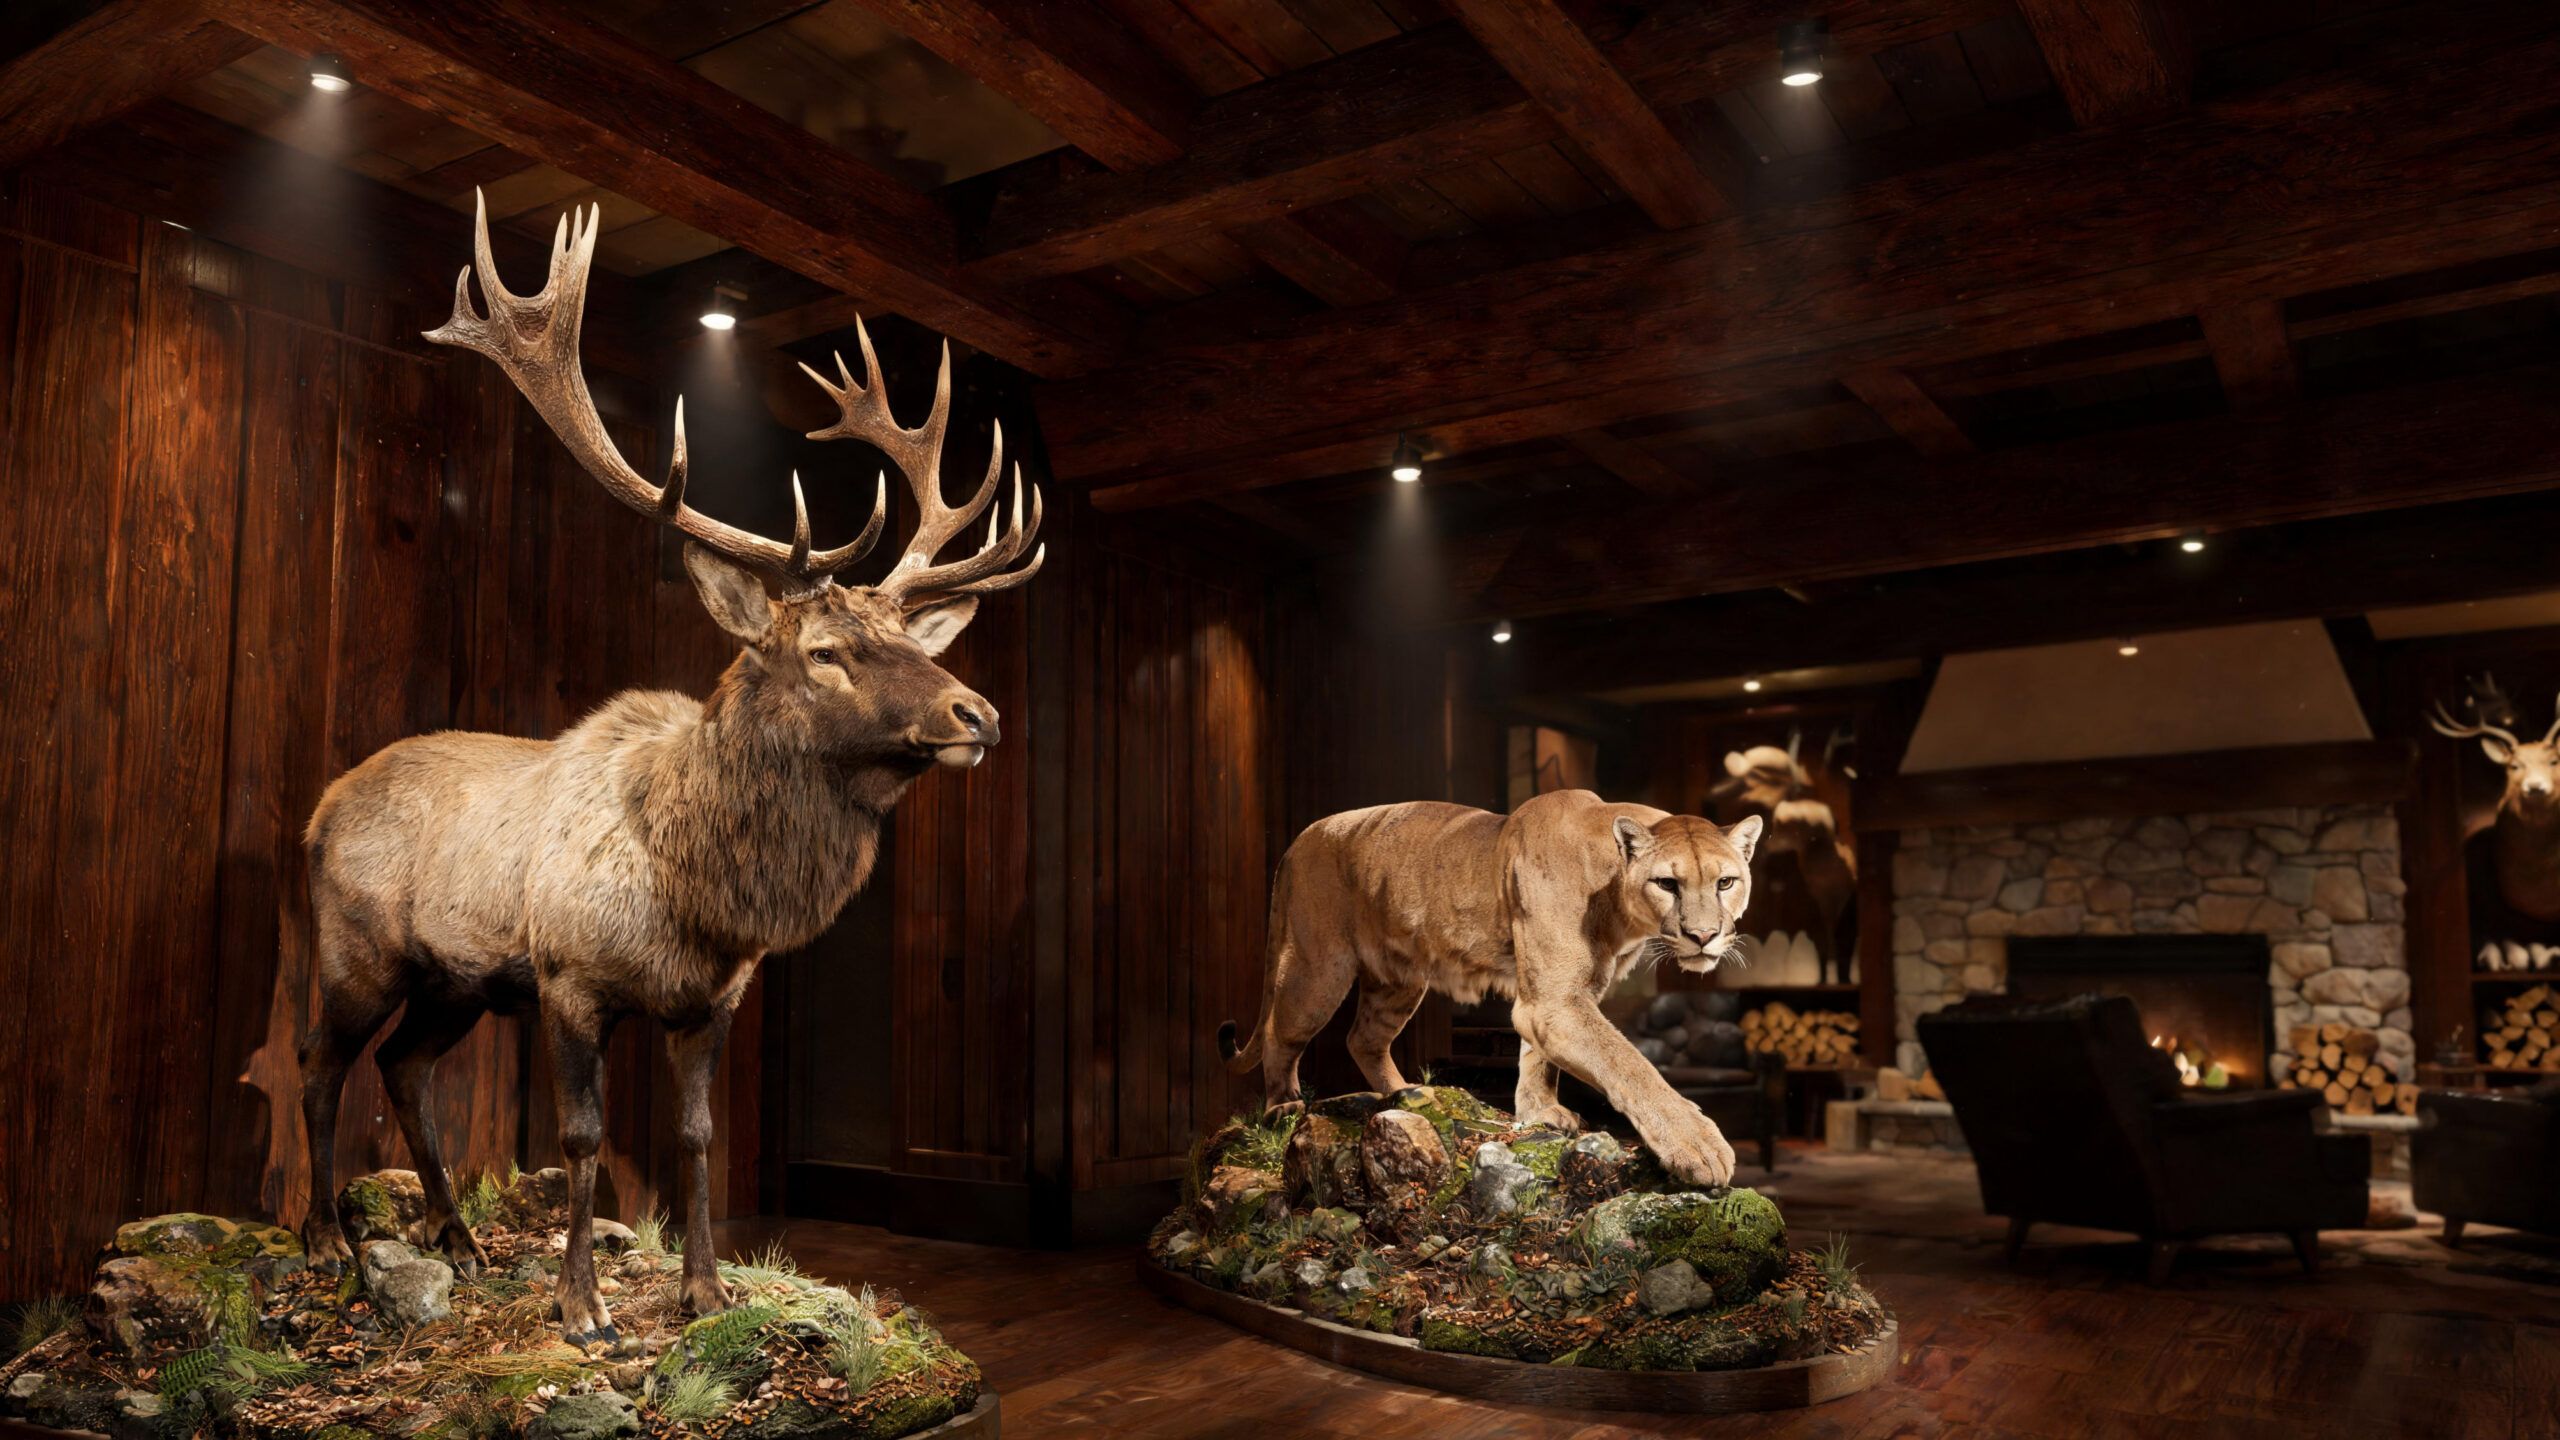
Full body mounts are the most dramatic option. These displays capture the entire animal and often include a custom habitat base. They are common for predators, birds, small mammals, turkeys, and once-in-a-lifetime trophies. Full body mounts require more space and more planning, but they can become the centerpiece of an entire room.
Choosing the Right Pose
Pose selection is one of the most important decisions in taxidermy. A pose should match the animal, the story, and the space where the mount will live. Upright poses feel proud and classic. Semi-sneak poses feel natural and alert. Full sneak poses create a low, cautious, lifelike energy. Aggressive turns can add drama, especially when the mount is viewed from an angle.
Beginners often choose poses based only on what looks impressive in a catalog, but room placement matters just as much. A mount displayed high above a fireplace may need a downward or turned pose to connect visually with viewers. A mount placed in a hallway may look better with a side-facing angle. A trophy room with multiple deer mounts needs pose variation so the display does not feel repetitive.
The Importance of Anatomy and Realism
Realistic taxidermy depends on anatomical accuracy. Eyes must be set correctly. Ears must match the animal’s expression. Nostrils, lips, eyelids, shoulders, muscles, and skin folds must feel natural. Even a small error can make a mount look lifeless or artificial. This is why reference photos are so valuable. Professional taxidermists often study live animal photography to capture posture, tension, and expression. For beginners learning the craft, anatomy should come before decoration. Habitat materials and fancy bases cannot save a poorly shaped face or awkward posture. The best mounts have quiet realism. Nothing feels exaggerated. Nothing looks forced. The animal appears calm, alert, defensive, curious, or powerful in a way that matches how it might truly behave in the wild.
Designing With Habitat Bases
Habitat bases add context. A deer mount may not need much habitat, but a full body bobcat, fox, turkey, duck, or bear can become far more impressive when placed in a realistic scene. Rocks, moss, grasses, driftwood, snow effects, leaves, reeds, and soil textures help create a sense of place. The mount no longer feels isolated. It feels like part of an environment.
The best habitat designs are believable but not overwhelming. Beginners sometimes make the mistake of adding too many decorative elements. A mount should remain the hero. Habitat should support the animal, not compete with it. A small patch of grass, a weathered branch, or a simple stone base can often be more effective than a crowded scene.
Trophy Room Layout Basics
A trophy room should be planned like an interior design project. Start with the largest mounts first. These are the visual anchors. Elk, moose, large deer, bear, and full body mounts need space around them so they can command attention. Once the main pieces are placed, smaller mounts can fill supporting areas.
Wall height, furniture placement, lighting, windows, fireplaces, and doorways all matter. A mount should not feel squeezed into a corner or hidden behind furniture. It should have breathing room. In larger rooms, symmetry can create a formal lodge feeling, while asymmetry can make the room feel more natural and organic.
Small trophy rooms benefit from restraint. A few well-placed mounts with strong lighting usually look better than too many pieces competing for attention. Vertical layouts, European mounts, antler displays, and wall pedestal mounts can help maximize limited space.
Lighting Makes the Mount Come Alive
Lighting can completely change how taxidermy looks. Warm directional light brings out fur texture, antler shape, feather detail, and facial expression. Poor lighting can make even a high-quality mount look flat. Trophy rooms often benefit from a mix of ambient lighting and focused accent lighting.
Spotlights should be placed carefully to avoid harsh glare, especially on glass eyes or fish mounts. Soft shadows can add drama, but overly bright light can make a display feel artificial. Natural sunlight should be controlled because long-term exposure can fade fur, feathers, and paint. UV-filtering window treatments, shaded placement, and balanced artificial lighting help protect mounts while improving the room’s atmosphere.
Working With a Professional Taxidermist
Choosing a taxidermist is one of the most important steps for beginners. Look closely at finished work, especially eyes, ears, noses, lips, symmetry, and grooming. A good taxidermist should be able to explain pose options, form choices, hide care, turnaround expectations, and display recommendations. The cheapest option is rarely the best option when preserving a meaningful trophy. Communication matters. Bring reference ideas, room photos, and measurements when possible. Explain where the mount will be displayed and what style you want. Rustic, modern, museum-quality, aggressive, traditional, compact, and luxury lodge designs all require different decisions. The more context your taxidermist has, the better the final mount will fit your vision.
Beginner Mistakes to Avoid
One of the biggest beginner mistakes is poor field care. The quality of the mount starts immediately after the harvest. Heat, dirt, dragging damage, improper cuts, and delayed cooling can all affect the final result. Hunters should learn basic cape care before the season begins, not after a trophy is already on the ground.
Another common mistake is choosing a pose without thinking about the room. A beautiful mount can look awkward if it faces the wrong direction or sticks too far into a narrow space. Beginners also sometimes overcrowd trophy rooms too quickly. It is better to build a collection slowly and design intentionally than to fill every wall at once.
Taxidermy as Craft and Design
Taxidermy belongs under craft and design because it requires hand skill, artistic judgment, material knowledge, and visual storytelling. It is not only about preservation. It is about composition. A taxidermist must understand texture, shape, color, balance, and emotion. A trophy room designer must understand space, lighting, architecture, and atmosphere. The most memorable displays feel personal. They are not just collections of animals. They are visual biographies of time spent outdoors. Each mount has a story, and the design around it helps that story come forward. A great trophy room makes guests pause, look closer, and ask what happened on that hunt.
Building Your First Display
For a beginner, the best first display might be simple: one shoulder mount, one European mount, or one carefully designed antler plaque. Start with quality rather than quantity. Choose a clean wall, add warm lighting, and give the piece enough space to stand out. From there, you can build slowly with more mounts, photos, rustic furniture, or habitat accents.
As your collection grows, think in themes. A deer wall, a waterfowl corner, a predator display, a fishing section, or a western big game area can help the room feel organized. The goal is not to impress people with volume alone. The goal is to create a space that feels powerful, respectful, and unforgettable.
The Future of Mount Design
Modern taxidermy continues to evolve. Today’s mounts are more realistic, more customizable, and more design-focused than ever before. Hunters are blending taxidermy with luxury interiors, museum-style displays, minimalist wall systems, reclaimed materials, and cinematic lighting. European mounts, wall pedestals, replica fish, habitat bases, and custom woodworking are giving trophy rooms more variety and personality. For beginners, this is an exciting time to enter the world of taxidermy and mount design. The options are nearly endless, but the fundamentals remain the same. Respect the animal, understand the craft, plan the display, choose quality work, and design with purpose. When done well, taxidermy becomes more than a mount on a wall. It becomes a lasting piece of wilderness art.